|
It's the Astronomy Online non-Blog, or un-Blog.
Everyone has a blog now and since I am no follower of trends, I decided to merge the blog with the website. And I don't want to neglect the website in favor of posting on the blog.
These are the pages that were on the blog of old:
- Home
- Archive (Index of Pages)
- Me
- Current Trends
- Links
- Soho Live
Links:
Google Maps - Mars
Google Maps - Moon
HiRISE
HiRISE - MRO Imaging
Mac Singularity
Meade4M
Slackerpedia Galactica
Software for the Mac
Starry Night Online
Venus Maps
More Favorites:


Thank you for visiting!
|
|
 |
|
Astrophotography with Consumer Grade Cameras:
Astrophotography is a wonderful hobby. I am only just starting myself, but what I have experienced I can say it is one of the most rewarding hobbies as well. Astrophotographers who are in the game know of some of the greats: Russel Croman, R. Jay Gabany, Ron Wodaski, Loke Tan, and Robert Gendler just to name a few. They use some of the best equipment available to capture those remarkable images.
But does one need the best of equipment to get started with astrophotography? Not at all!
For this activity, I decided to capture an image of the constellation Orion using my point-and-shoot Nikon Coolpix 995. They don't make this particular model anymore and I cannot tell you what the specs are, but what it can do is offer shutter speeds useful for astrophotography: an 8 seconds exposure and Bulb (shutter remains open as long as the button is pushed).
The tools I used for this activity:
- Nikon Coolpix 995
- Tripod - as sturdy as possible
- MaxIm DL - for reduction and stacking
- PhotoShop CS2
- Neat Image PhotoShop plugin
MaxIm DL is an astronomy specific program that can read and edit the major image file types - including FITS which is an imaging standard used by astronomers. MaxIm is one of several programs you can use to calibrate and stack images. Visit our Software page to learn more.
Image calibration is a method of cleaning up an image by subtracting noise and setting the black point. Consumer grade digital cameras are extremely noisy and not suited for astronomy. However, image reduction - the act of subtracting noise and artifacts - can be applied to images from these cameras.
There are three types of calibration images that are used to 'reduce' an actual image:
- Dark Frame - an image of equal duration to the actual image with the aperture blocked - used to image noise on the chip and within the electronics
- Flat Field - an image taken with an even, light background to identify artifacts within the optical system
- Bias - a near-zero second image to set the black point (exposure should be as short as possible)
A bias and flat field image was not acquired. For a telescope, a flat field image is important as this identifies dust on the lens or mirror - for example a telescope and camera can have several optical surfaces to introduce dust motes. Since this camera only has one optical element - the lens - a flat field would not benefit the final result.
My light frames (light frames are actual images) were captured with the bulb setting, holding the shutter button for 15 seconds. My dark frames were captured with the lens cap on for 15 seconds as well. I captured 3 sets of light and dark frames. It is important to set the quality at the highest setting. The maximum quality setting on the Nikon 995 is "HI" - the files are in TIFF format. I decided on an ISO setting of 400 - the choices on the Nikon 995 are 100, 200, 400 and 800. 800 has far too much noise and 200 does not capture the dim stars. My zoom was halfway; because of this, I had to limit holding the button down (Bulb) for 15 seconds - any longer than this would lead to star trailing. Finding the proper exposure time was trial and error.
  
Using MaxIm DL, I subtracted the noise by setting the noise only image as the dark frame. The calibration wizard also asks for the location of the flat and bias frames but I left these blank. I subtracted the dark frame from all three light frames.
The three calibrated images were "stacked" using the MaxIm combine tool using the automatic align. By stacking multiple images to a single image, the signal-to-noise of the final image is increased. Once aligned, the file was saved as a new TIFF file and opened in PhotoShop for image processing. Once in PhotoShop, I used levels, curves and color balance to bring out the details. For further noise reduction, Neat Image is one of the best tools out there. While it can provide a noise reduction profile on the fly, the website has profiles available specific to camera and ISO setting.
So if you want to start the hobby of astrophotography and all you have is a point and shoot digital camera, you have a place to start. Taking images of constellations is a good place to start - you don't even need a telescope. If you have a telescope, places like ScopeTronix sells a wide variety of adapters for a wide variety of cameras. Using the technique of taking dark frames can be applied to images taken through a telescope to improve image quality.
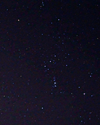
Check out the images above to see a single image (noise and all), an image of just the noise (there is a lot of noise), and the final result (minus the noise and image processed in PhotoShop CS2).
Good luck and have fun.
Next Post | Previous Post | Back to Top
|
|

